Published
- 5 min read
ESP and AWS-S3 Integration part 1: Create AN AWS bucket

- In the first post (this post ) we look at how to set up a bucket
- In the second post we look at how to use the AWS-S3 library and how it works
Why and what is s3
This is a multipart blog series on how to use the ESP32 with an AWS32 bucket In this blog we cover how to create a bucket with permissions that the ESP32 can use.
If you know anything about the ESP32 you probably know it has the capability to connect to the WiFi and communicate to the internet.
We might consider having to build an entire backend project consisting of databases api’s admin portals, user portals, authentication etc. etc.
However, more often then not we just want something simple where we can upload and download data for the purpose of
- logs
- OTA (Over the Air) firmware updates
- configuration
- etc.
AWS-S3 (Simple Storage Service) is a good option to upload and download files. It comes with the following benefits out of the box
- It’s cheap
- It’s secure
- It can version
- it can even Kick off code called lambda functions when something is uploaded, downloaded etc.
AWS S3 charges less then a cent for gigabytes of data. On the ESP32 OTA’s are roughly 1MB - 4MB. I’m not an AWS pricing expert but in my experience using AWS S3 as an ESP32 backend costs me virtually nothing. You can read more here
The challenge with using S3 is that the authentications mechanism is not trivial. However I have written a library that should help ease the burden considerably.
The following is a guide to get you started using S3 with your ESP32 project
Steps to create a bucket and assign permissions
If you haven’t got an AWS account you should sign up for one at https://aws.amazon.com. A credit card is required but they don’t charge you anything to sign up.
Create an S3 Bucket
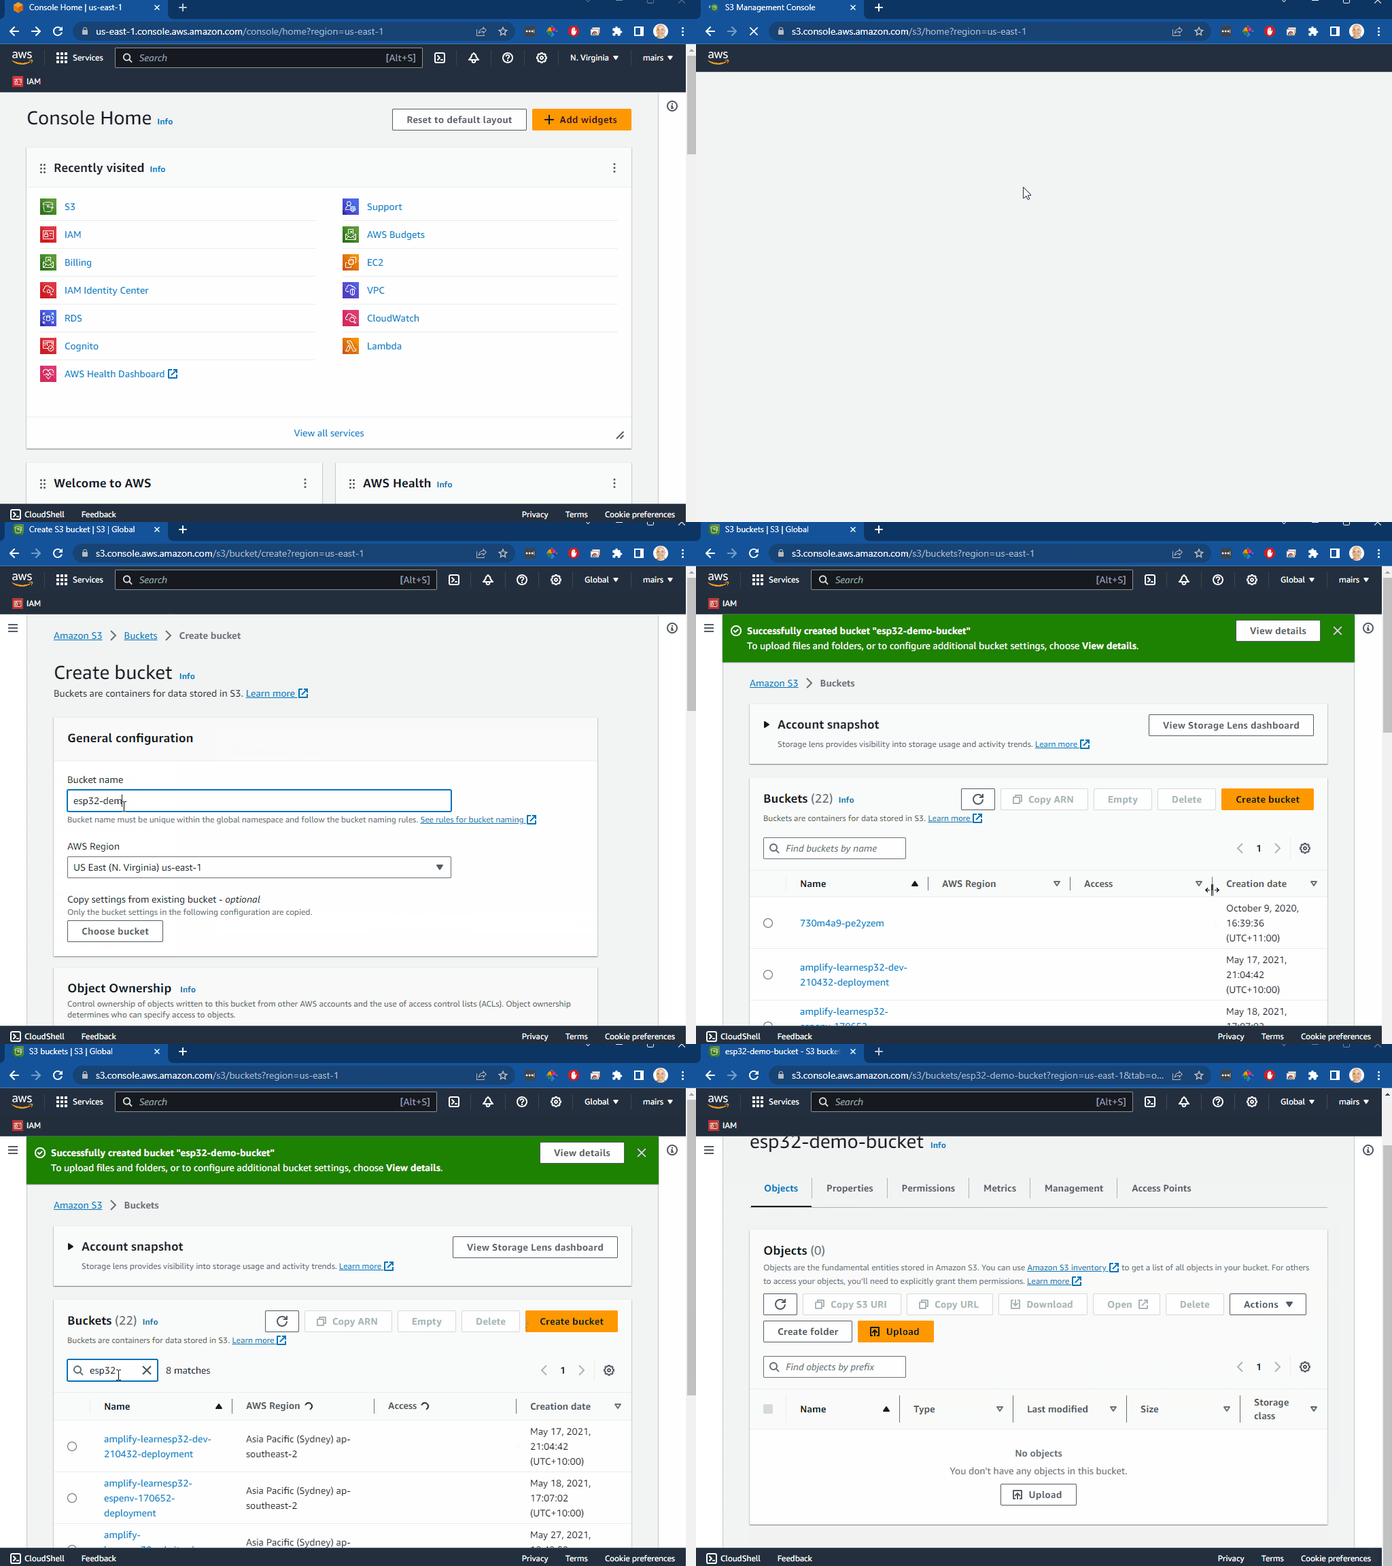
- in the top search bar type S3
- click on S3
- click on
"create bucket" - give the bucket a name
- scroll to the bottom and click create bucket
- you will now be shown the list of buckets. Search and select the bucket you jsut created
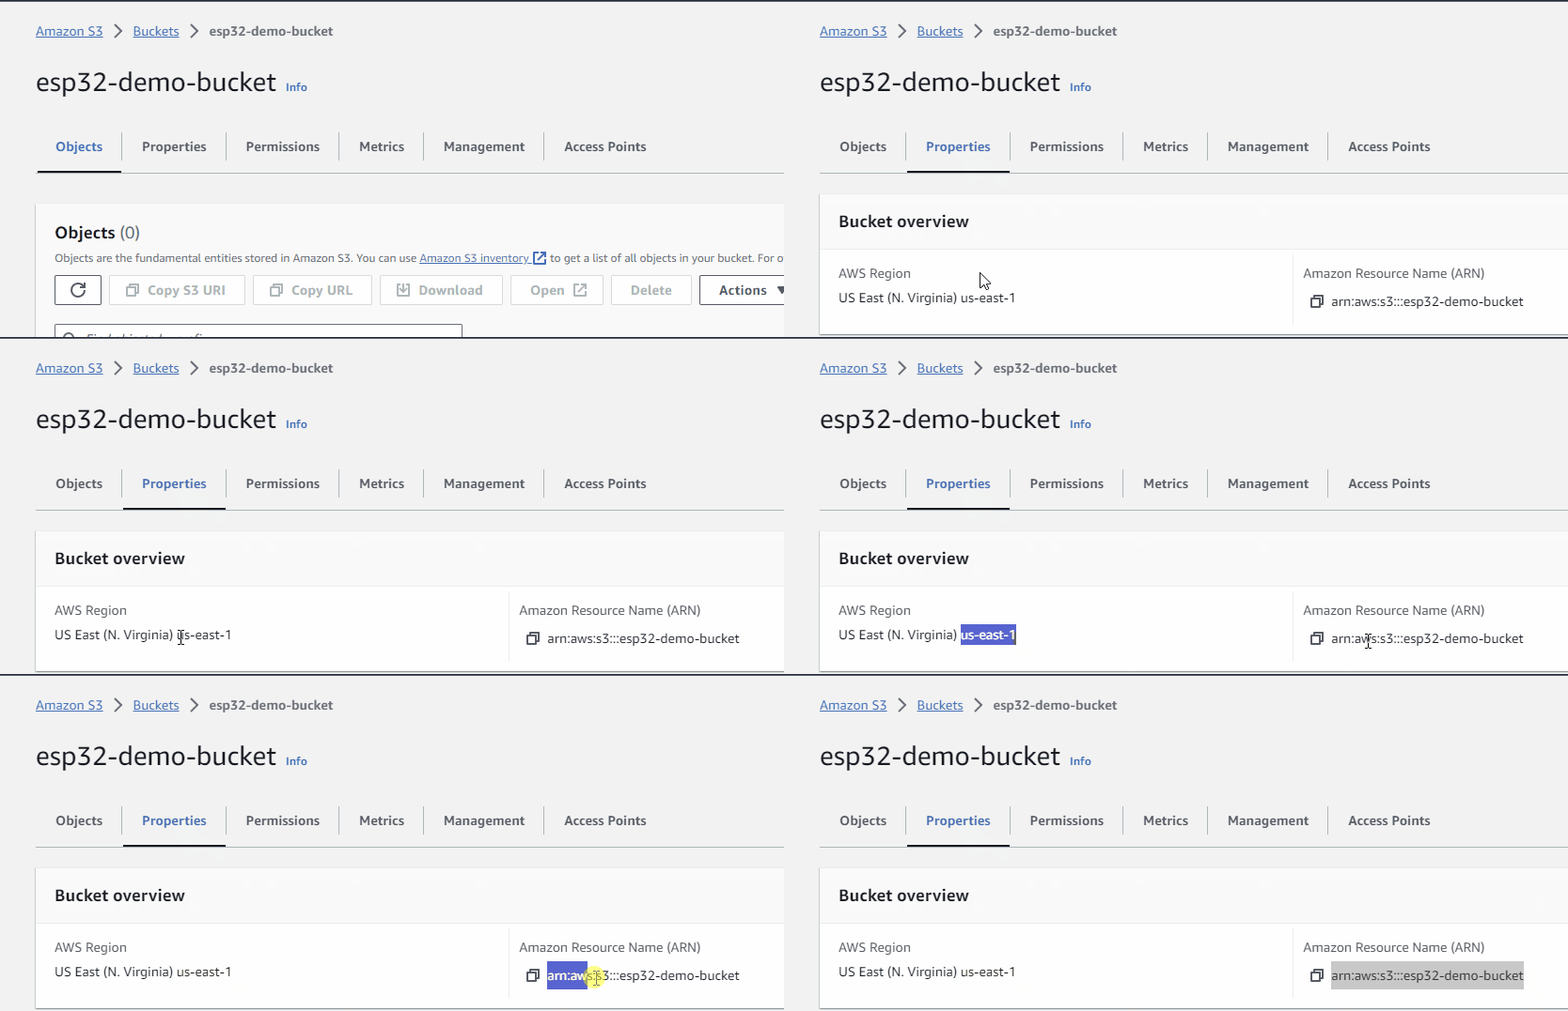
- click on properties tab
- make a note of the region
- make a note of the ARN (Amazon Resource Name)
Create a dedicated account to have permissions to the bucket
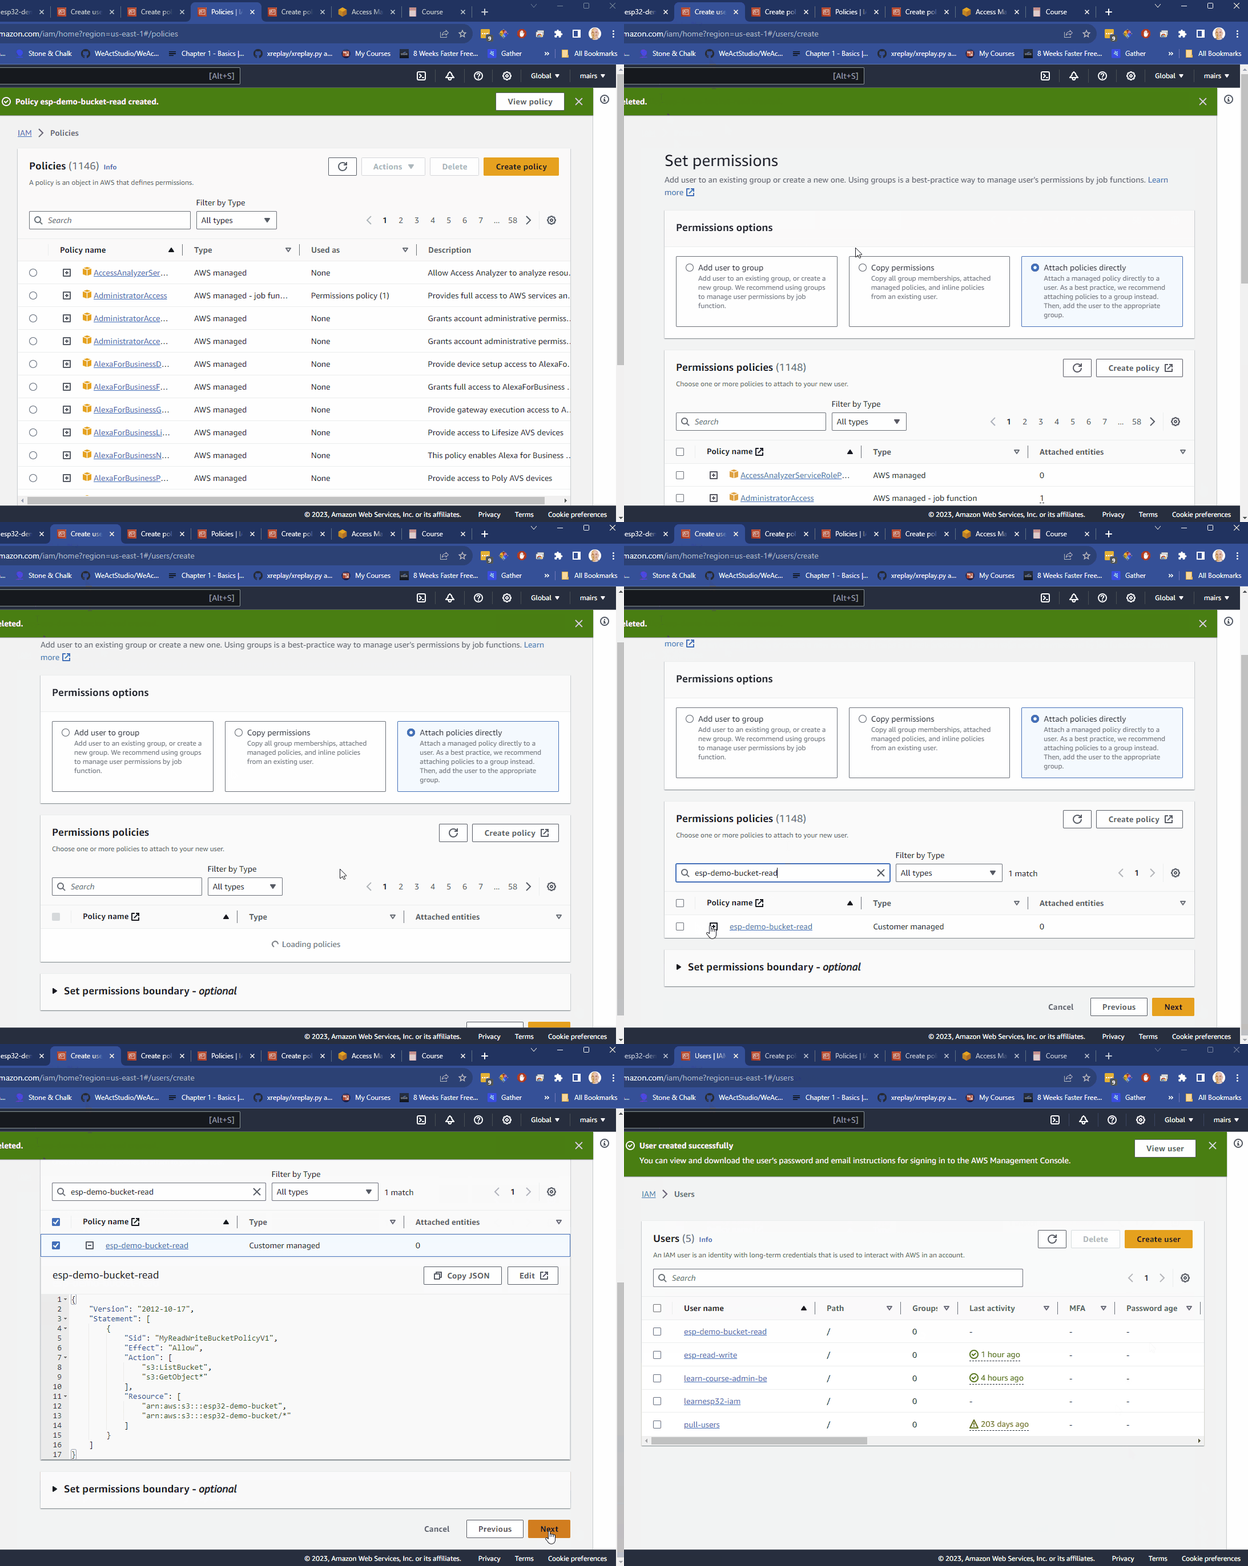
In this step we create an IAM (Identity and Access Management User) to have permissions to use the newly creates S3 bucket.
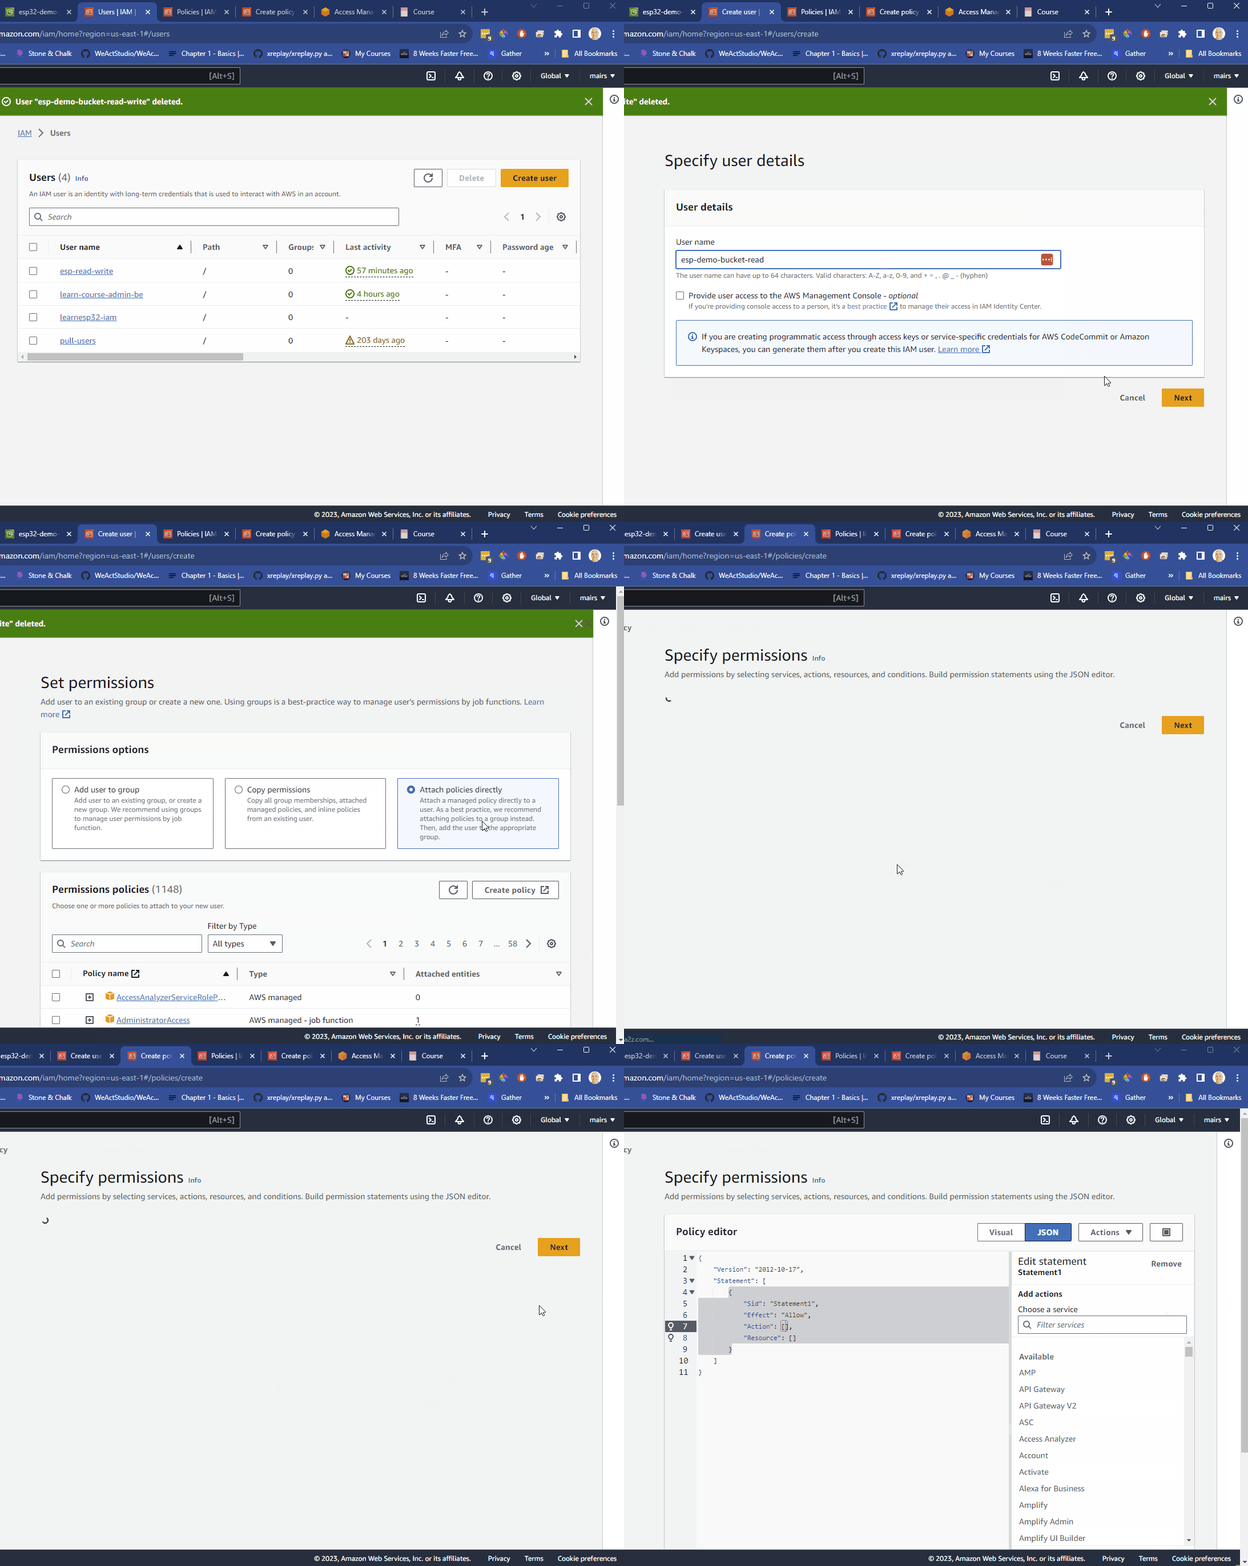
- In the search at the top, search for IAM and select IAM
- In the left hand column select
"Users" - Click on
"Create user" - give the user a descriptive name. E.g. “esp-demo-bucket-read”
- click
"Next" - click on
"Attach policies directly" - click on
"create policy" - click on
"JSON"
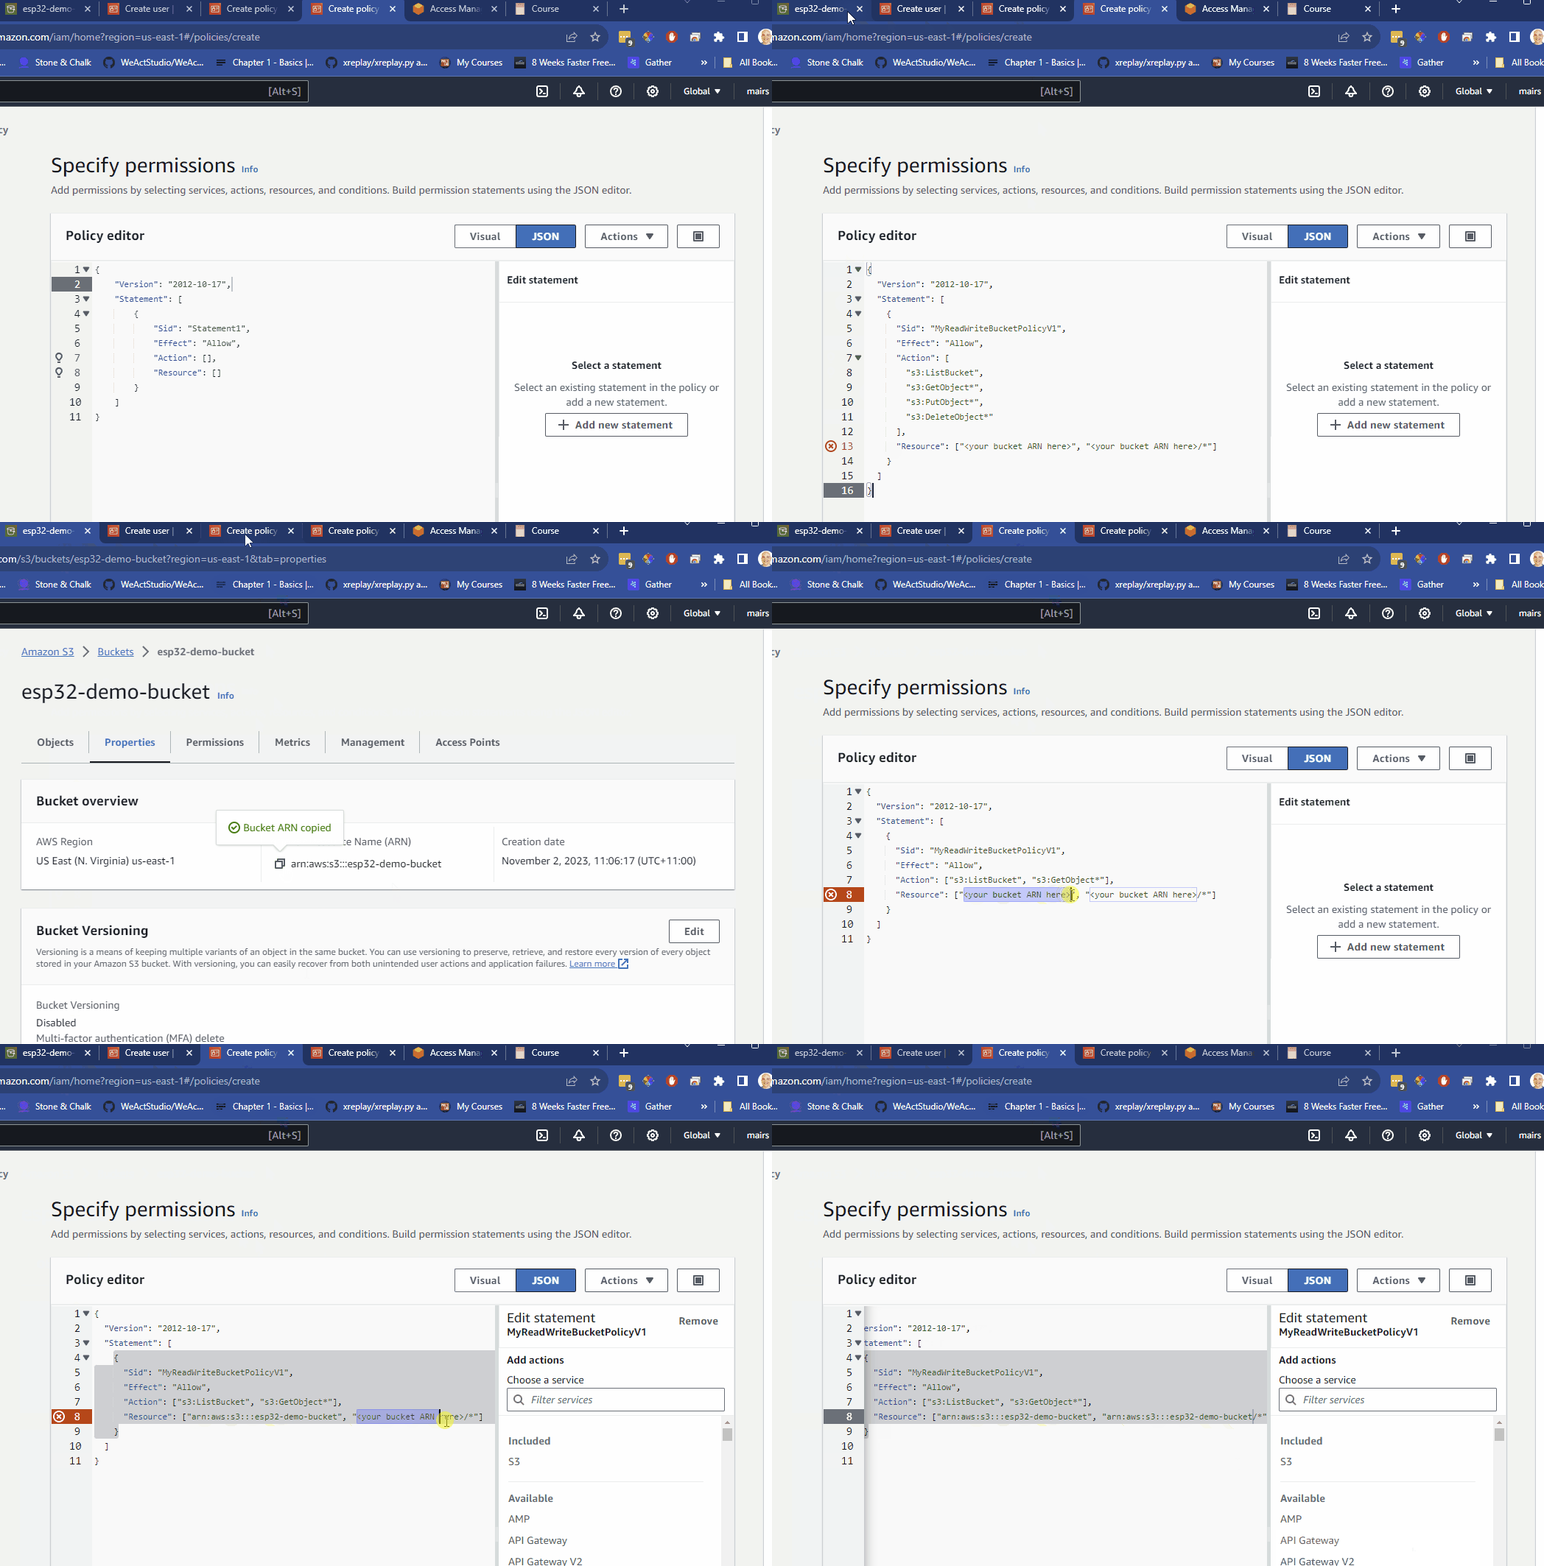
- copy paste one of the following JSON into the policy editor
For read-only
       {
	"Version": "2012-10-17",
	"Statement": [
		{
			"Sid": "MyReadWriteBucketPolicyV1",
			"Effect": "Allow",
			"Action": ["s3:ListBucket", "s3:GetObject*"],
			"Resource": ["<your bucket ARN here>", "<your bucket ARN here>/*"]
		}
	]
}
For read and write
       {
	"Version": "2012-10-17",
	"Statement": [
		{
			"Sid": "MyReadWriteBucketPolicyV1",
			"Effect": "Allow",
			"Action": ["s3:ListBucket", "s3:GetObject*", "s3:PutObject*", "s3:DeleteObject*"],
			"Resource": ["<your bucket ARN here>", "<your bucket ARN here>/*"]
		}
	]
}
For read and write on multiple buckets
       {
  "Version": "2012-10-17",
  "Statement": [
    {
      "Sid": "MyReadWriteBucketPolicyV1",
      "Effect": "Allow",
      "Action": [
        "s3:ListBucket",
        "s3:GetObject*",
        "s3:PutObject*",
        "s3:DeleteObject*"
      ],
      "Resource": [
        "<your bucket ARN here>",
        "<your bucket ARN here>/*"
        "arn:aws:s3:::my-other-bucket",
        "arn:aws:s3:::my-other-bucket/*"
      ]
    }
  ]
}- replace
<your bucket ARN here>with the ARN you got when creating the bucket
e.g. If I want to have only read for my bucket with an ARN of arn:aws:s3:::esp32-demo-bucket, it would look like this
       {
	"Version": "2012-10-17",
	"Statement": [
		{
			"Sid": "MyReadWriteBucketPolicyV1",
			"Effect": "Allow",
			"Action": ["s3:ListBucket", "s3:GetObject*"],
			"Resource": ["arn:aws:s3:::esp32-demo-bucket", "arn:aws:s3:::esp32-demo-bucket/*"]
		}
	]
}
- click
"Next" - Give the new policy a name such as esp-demo-bucket-read
- click on create policy
- You will now see a list of policies. click on the previous tab to get to the list of users
- click the refresh button next to the policy button.
- search for your new policy
- select it
- click
"NEXT - click
"Create USER"
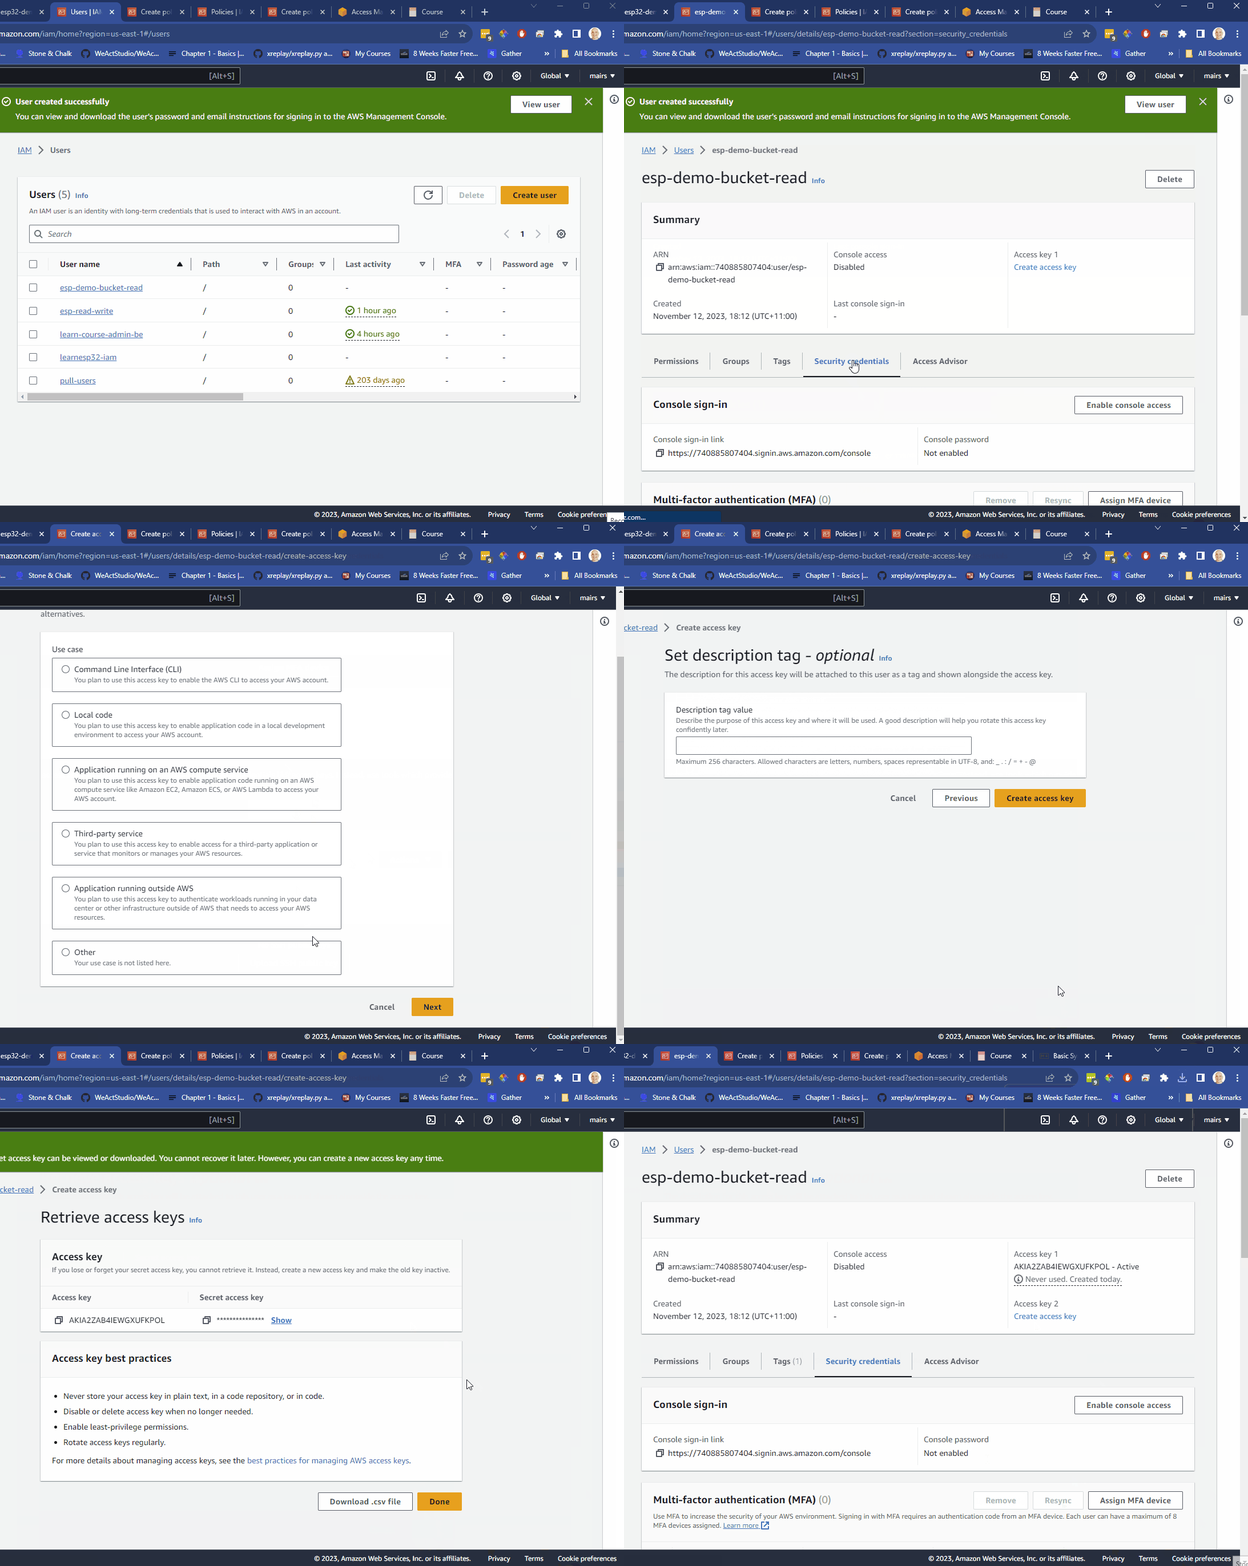
- click on the user
- select security credentials
- navigate down to access key and select
"create access key" - select
other - click next
- give a description such as esp-demo-bucket-read-key
- store the Access key and secret in a secure place.
Important ⚠️ once you navigate away from this page you cannot get the secret back so, store it securely
Testing it
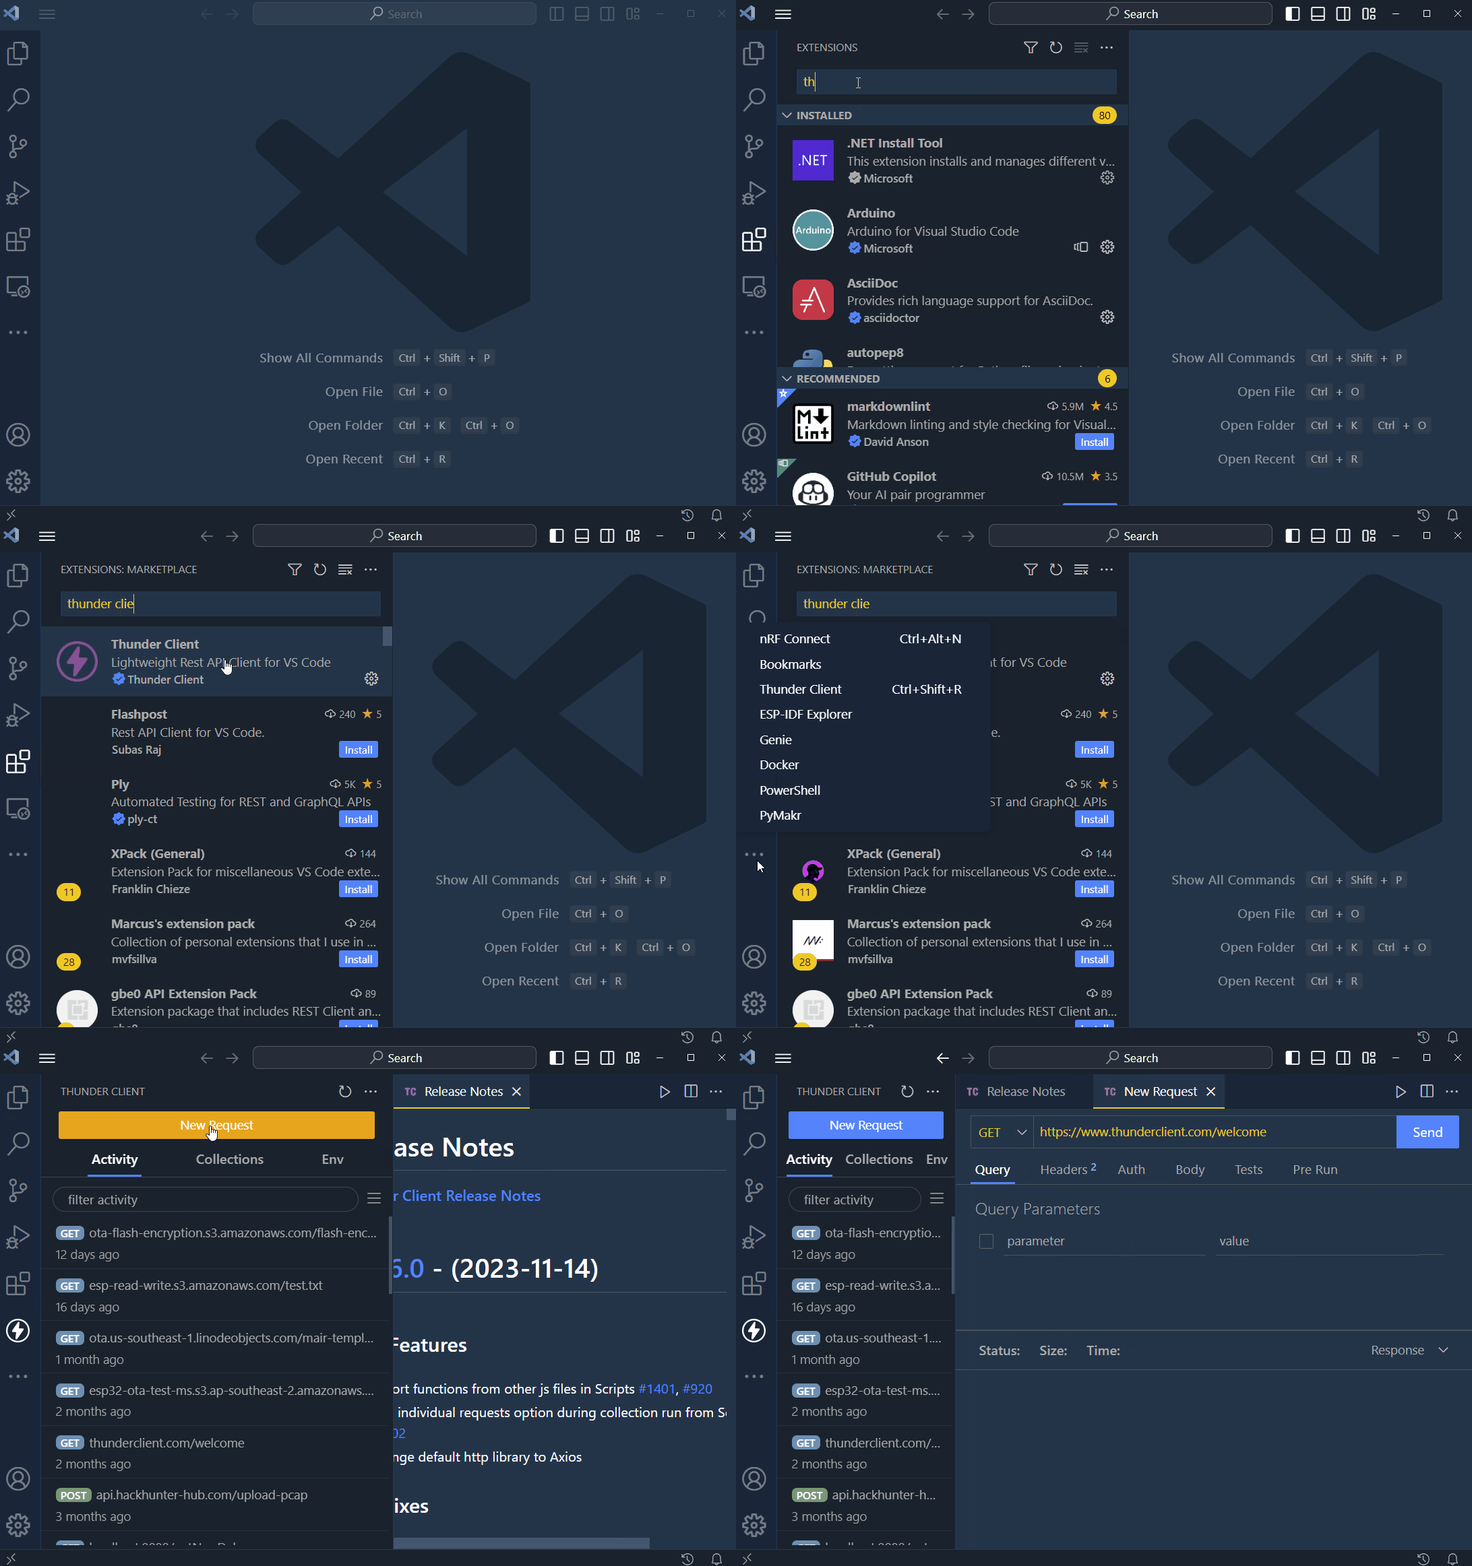
We need to ensure the credentials are set up correctly. We will use thunder client which is an extension to VSCode
Install Thunder Client
- open vscode
- navigate to the extensions button
- if you don’t have Thunder Client installed. Install it
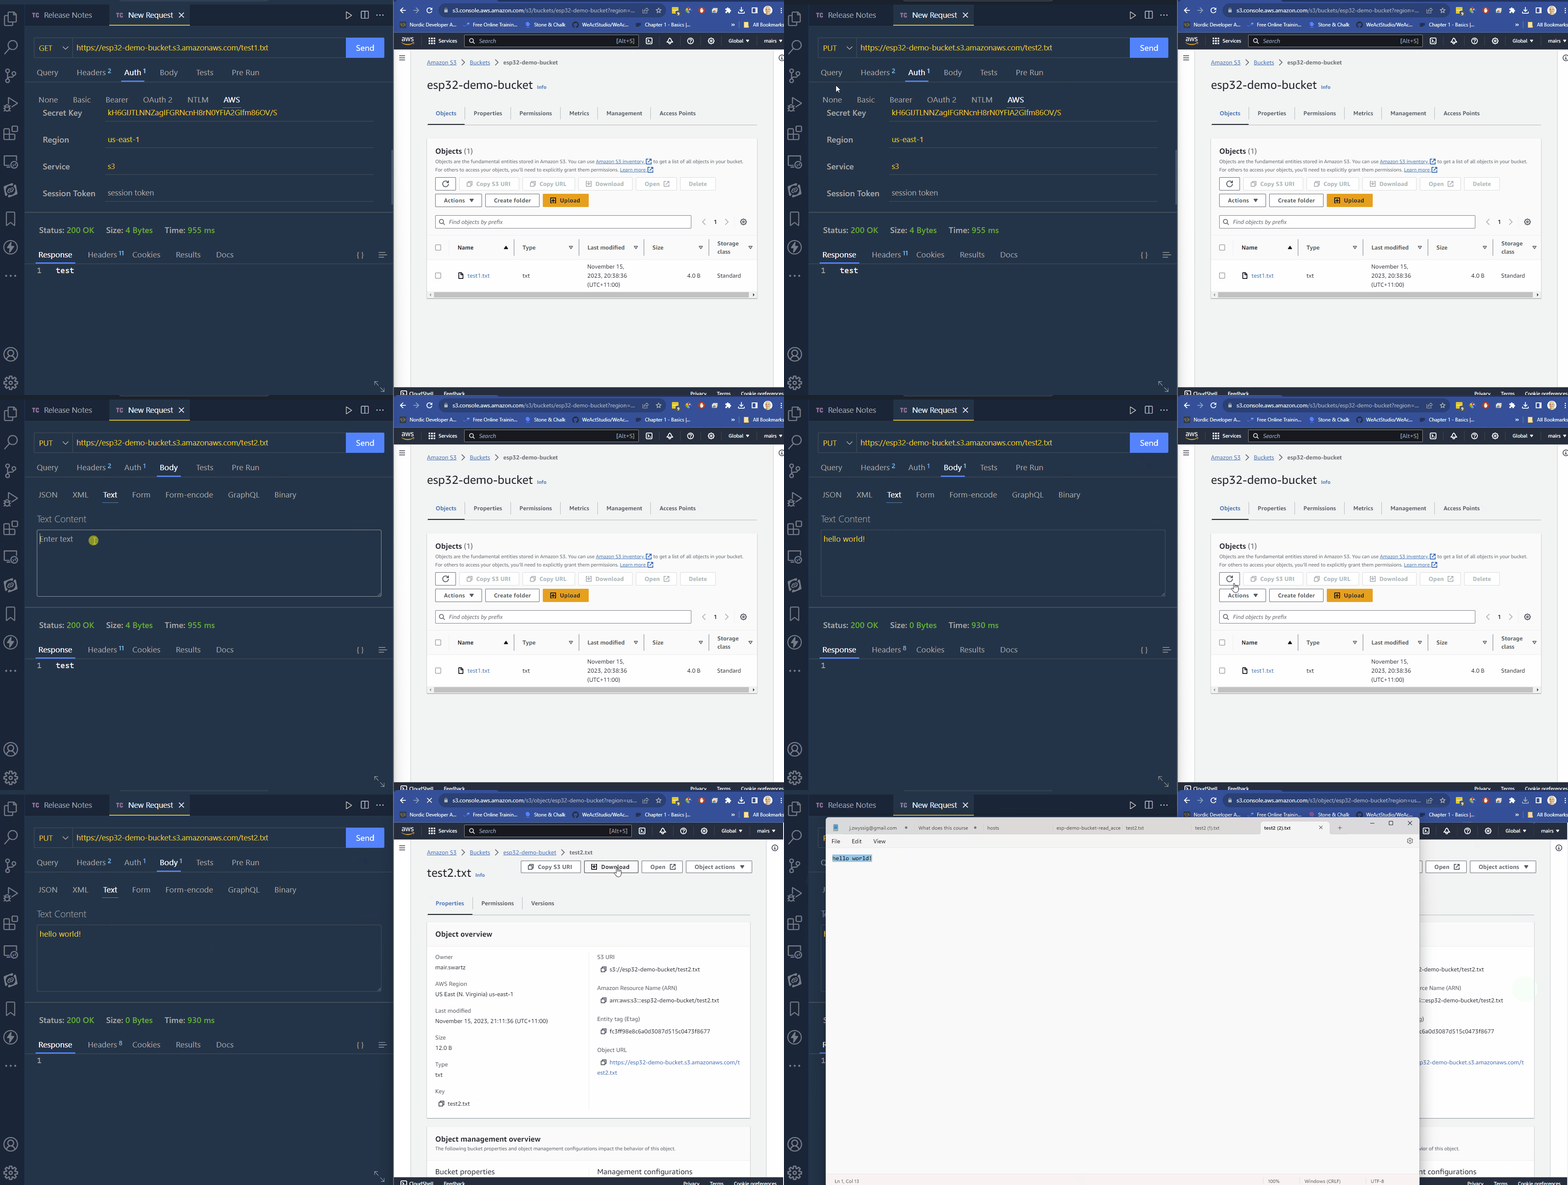
Get a file
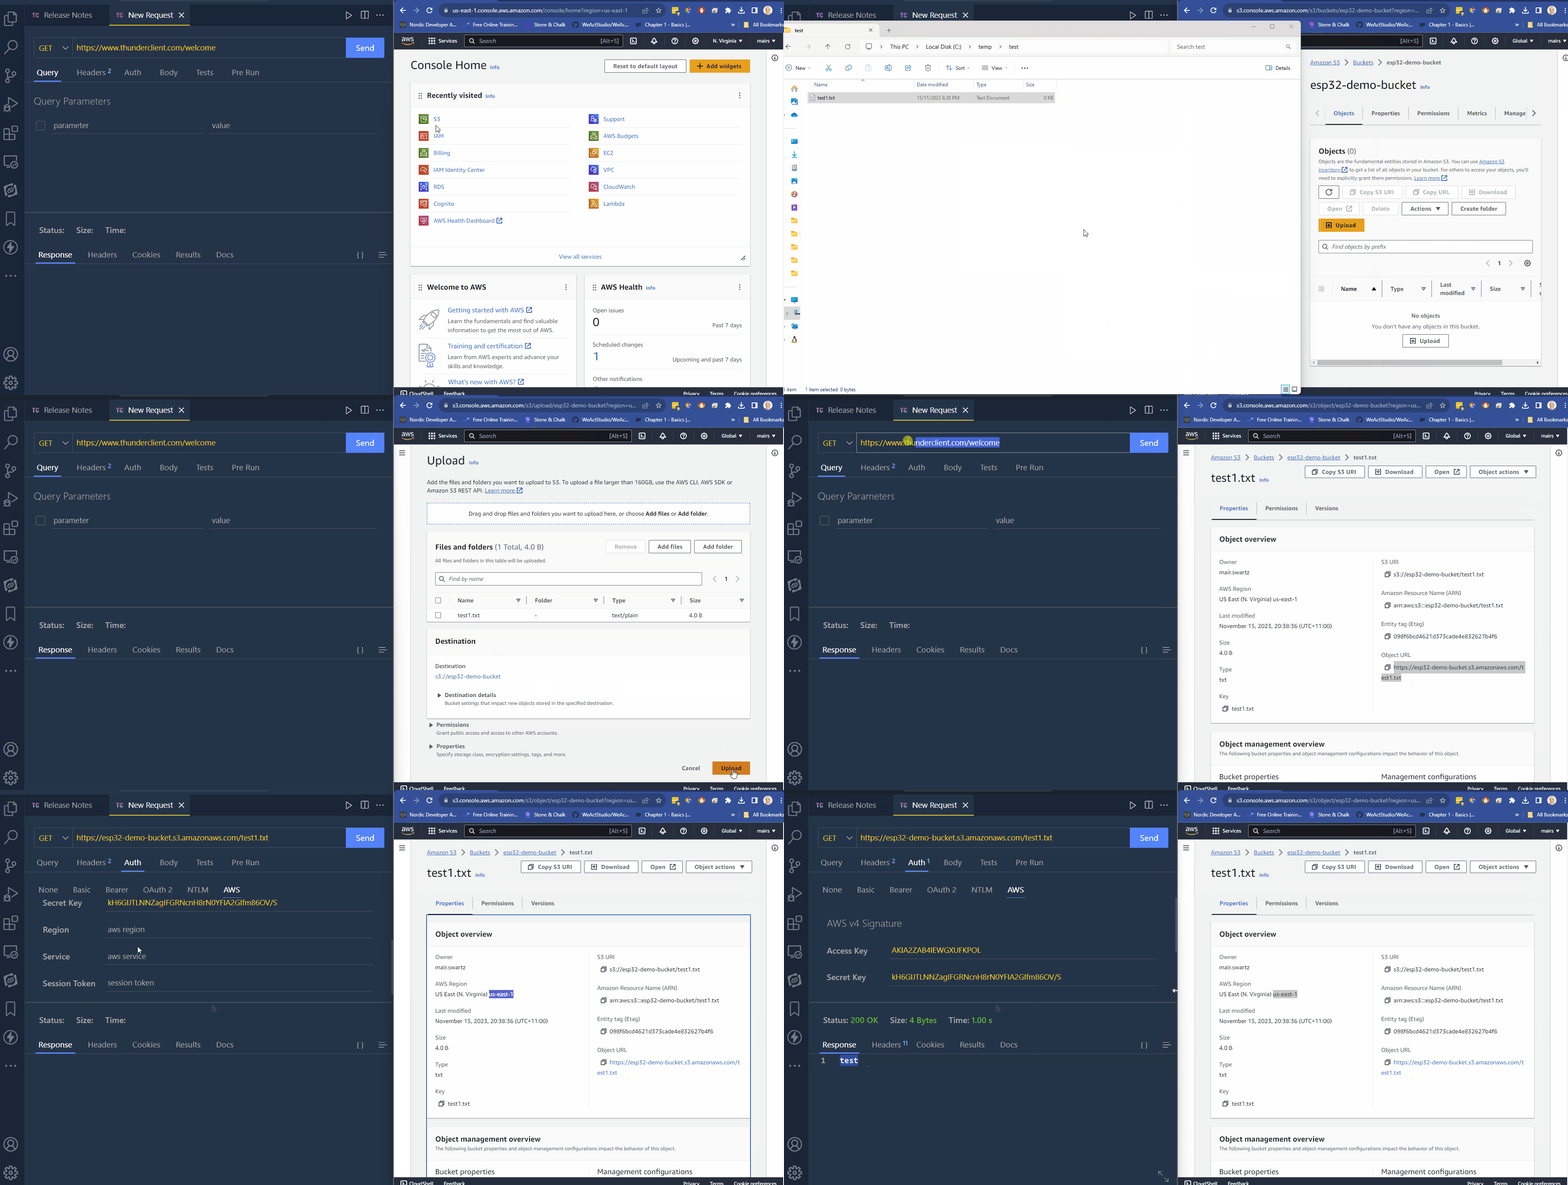
- navigate to your s3 bucket
- upload a document
- click on it
- copy the URL to Thunder Client
- click on the auth tab
- click on the AWS sub tab
- enter the access key
- enter the secret
- enter the region which will be visible in the AWS page
- enter “s3” in service 14 click send
upload a file
NB: if you llok at the polocies above in the “Action section”, only users who have the s3:PutObject\* will be able to upload / write files
- change the name of the file in the URL to the file name you want it to upload as
- change the method PUT
- click on the bidy tab
- enter content (as test or jason)
- click send.
- you can now see the file in S3
- download the file
- It should have the same content
Congratulations we have a working S3 bucket. Next we’ll look at using the bucket with an ESP32